Introduction
My minimum bar for learning a new technology is “getting started.” In my view, reaching that level requires two things:
- A solid understanding of the core concepts in the field—at least enough that when industry folks mention a concept, you have a rough idea of what it means;
- Hands-on practice—using what you’ve learned to build something real and presentable.
Lately I’ve been interested in blockchain technology. After learning the core concepts, I wanted to build something with it. While brainstorming what project to use as my “getting started” test, the idea of a message board suddenly came to mind.
Traditional message boards are almost always built on centralized services, which means whoever controls the central server can delete or tamper with users’ messages. But if we could leverage blockchain’s near-immutability to put messages on-chain, and make the smart contract code public, that would be a perfect closed loop—neither the message authors nor the contract creator could tamper with the content. Add a frontend that fetches on-chain messages when users visit, and everyone can see them. Even if the frontend goes offline, anyone can still view the messages on-chain using the open-source contract code and the public ABI.
Let’s do it!
Tech Stack
- Solidity - Ethereum smart contract programming language
- React - Frontend framework
- Tailwind CSS - Styling framework
- Wagmi - Web3 development library
- Cloudflare Workers - Backend proxy service
Project directory tree (generated with my open-source CLI: Treex):
1 | 📁 ./ |
Main Content
GitHub open-source repo: https://github.com/shiquda/chain-message
Live demo: https://msg.shiquda.link/
Deployment guide: https://github.com/shiquda/chain-message/blob/main/DEPLOY_GUIDE.md
To fully understand this article, some blockchain knowledge is helpful. If you don’t have any, no worries—I’m confident that with your smart brain, you can easily pick it up using LLMs along the way. If you’re interested in trying this hands-on, you’ll also need a wallet plugin. (I use OKX’s Web3 wallet)
Smart Contract
First, we need to write the smart contract code. A smart contract can be simply understood as a piece of code that runs on the blockchain, and the entire blockchain can be viewed as a state machine. Interacting with smart contracts transitions the state machine from one state to another. Smart contracts support two types of calls: Read-type calls, which don’t require Gas fees, and Write-type calls, which involve write operations and are more expensive, requiring Gas.
The smart contract I wrote only exposes two interfaces. The first is postMessage, a Write Contract that lets users submit their messages. The name field is optional—if left blank, it’s treated as an anonymous message. It should also support Markdown format, which is handled on the frontend.
1 | function postMessage(string memory _name, string memory _content) public { |
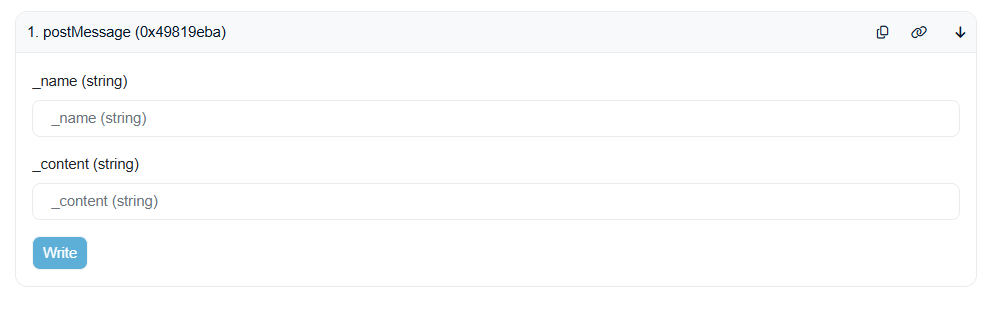
After a message is sent, the smart contract automatically stores not only the parameters above but also the timestamp of when it was sent.
1 | event MessagePosted( |
There’s also an interface for querying the total number of messages. This interface is read-only—calling it merely queries the blockchain state and doesn’t consume gas. This interface isn’t actually used by the project yet.
1 | function getMessageCount() public view returns (uint256) { |

Other than that, no other interfaces are exposed, which means once a message is on-chain, even I can’t delete it.
Now let me explain how I deployed the smart contract. I used Remix, an online IDE recommended by the Ethereum Foundation that’s beginner-friendly.
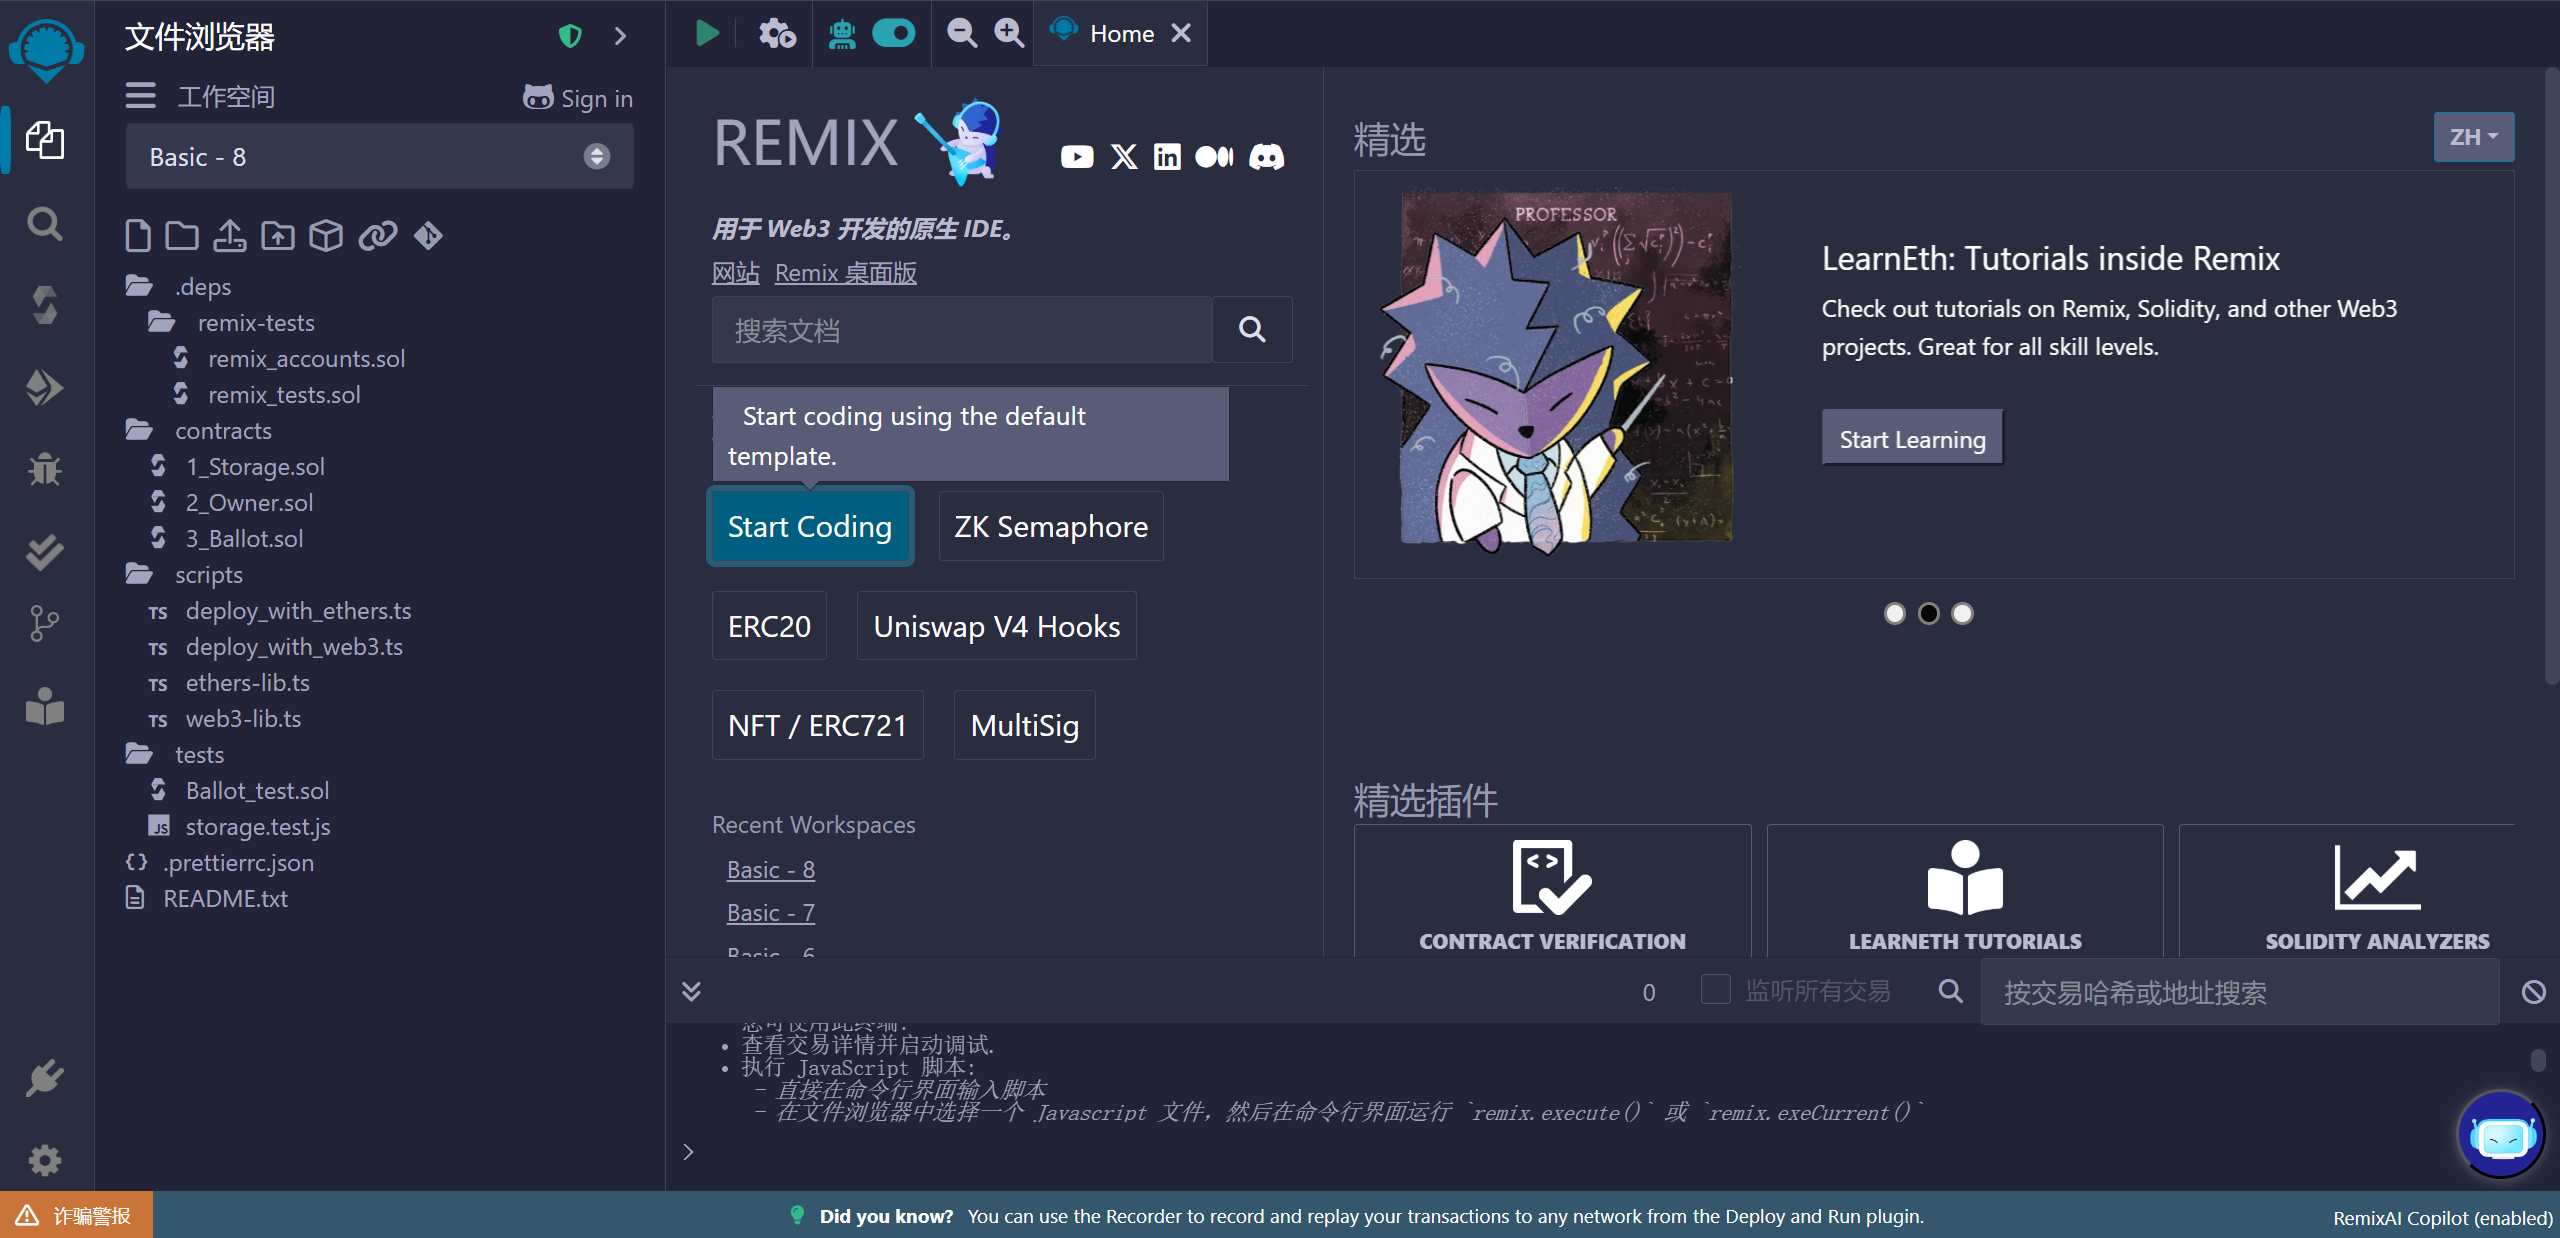
Paste the locally written contract into Remix, then compile it. After compilation, select the deploy tab on the left.
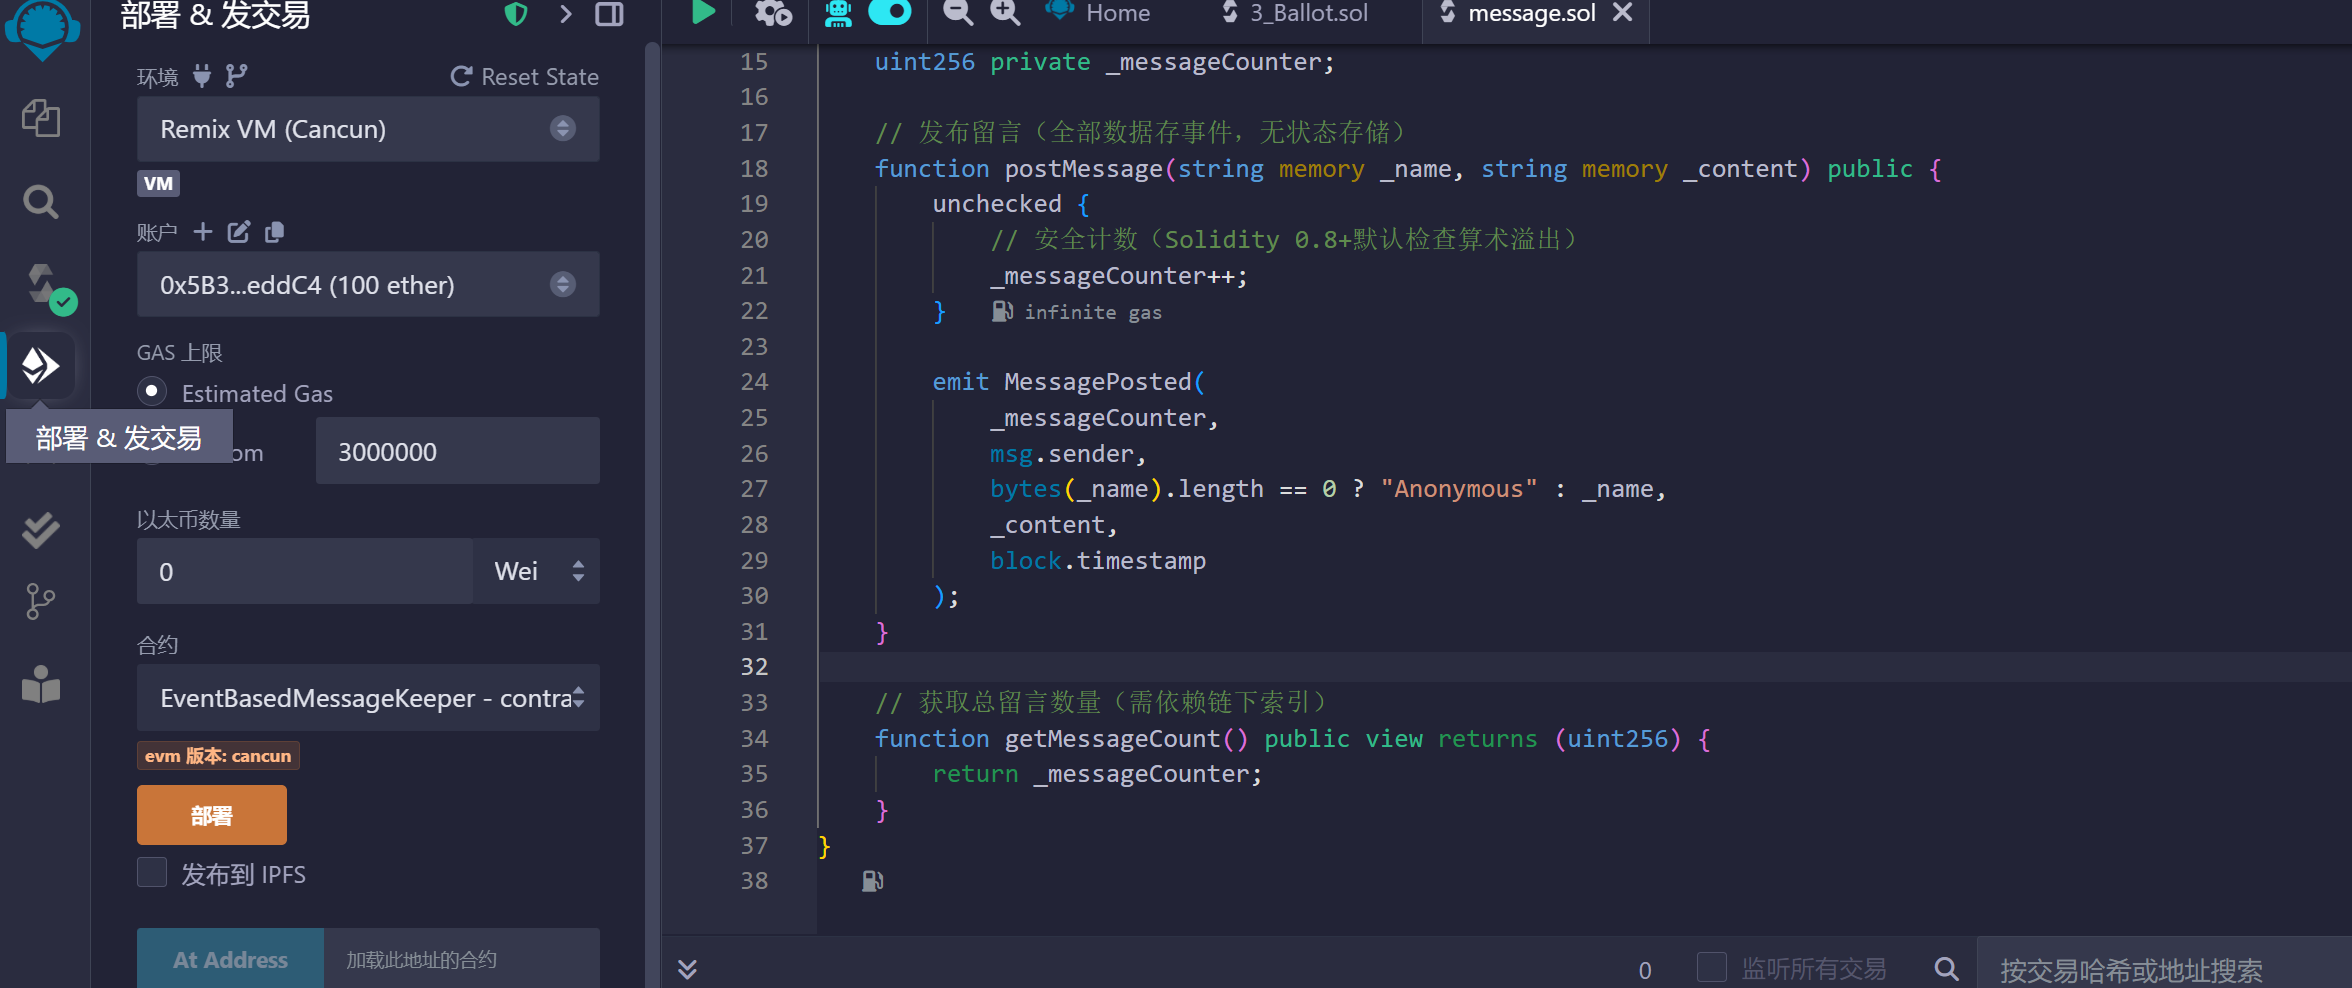
Choose WalletConnect and connect your wallet plugin as prompted. Once connected, click deploy and confirm in your wallet plugin—the contract will be deployed on-chain.
Deploying a contract requires a fairly high Gas fee, so you may need to withdraw some funds from a centralized exchange to your wallet. My last deployment cost around $0.37. After deployment, you can also verify your contract source code on Etherscan, so anyone can publicly audit the contract code and verify the system’s immutability.
One thing to note: I used the smart contract’s event logs to record messages. I chose this over storing directly in contract storage because storage would consume significantly more Gas. Using event logs reduces this cost, so users pay less Gas when submitting messages. In my testing, submitting a message cost about $0.05—roughly 30 cents RMB.
Of course, testing on a testnet first would have been the safer approach, but I was too eager to deploy my first smart contract to the mainnet. I’d advise you not to follow my example here 🤣
Frontend Implementation
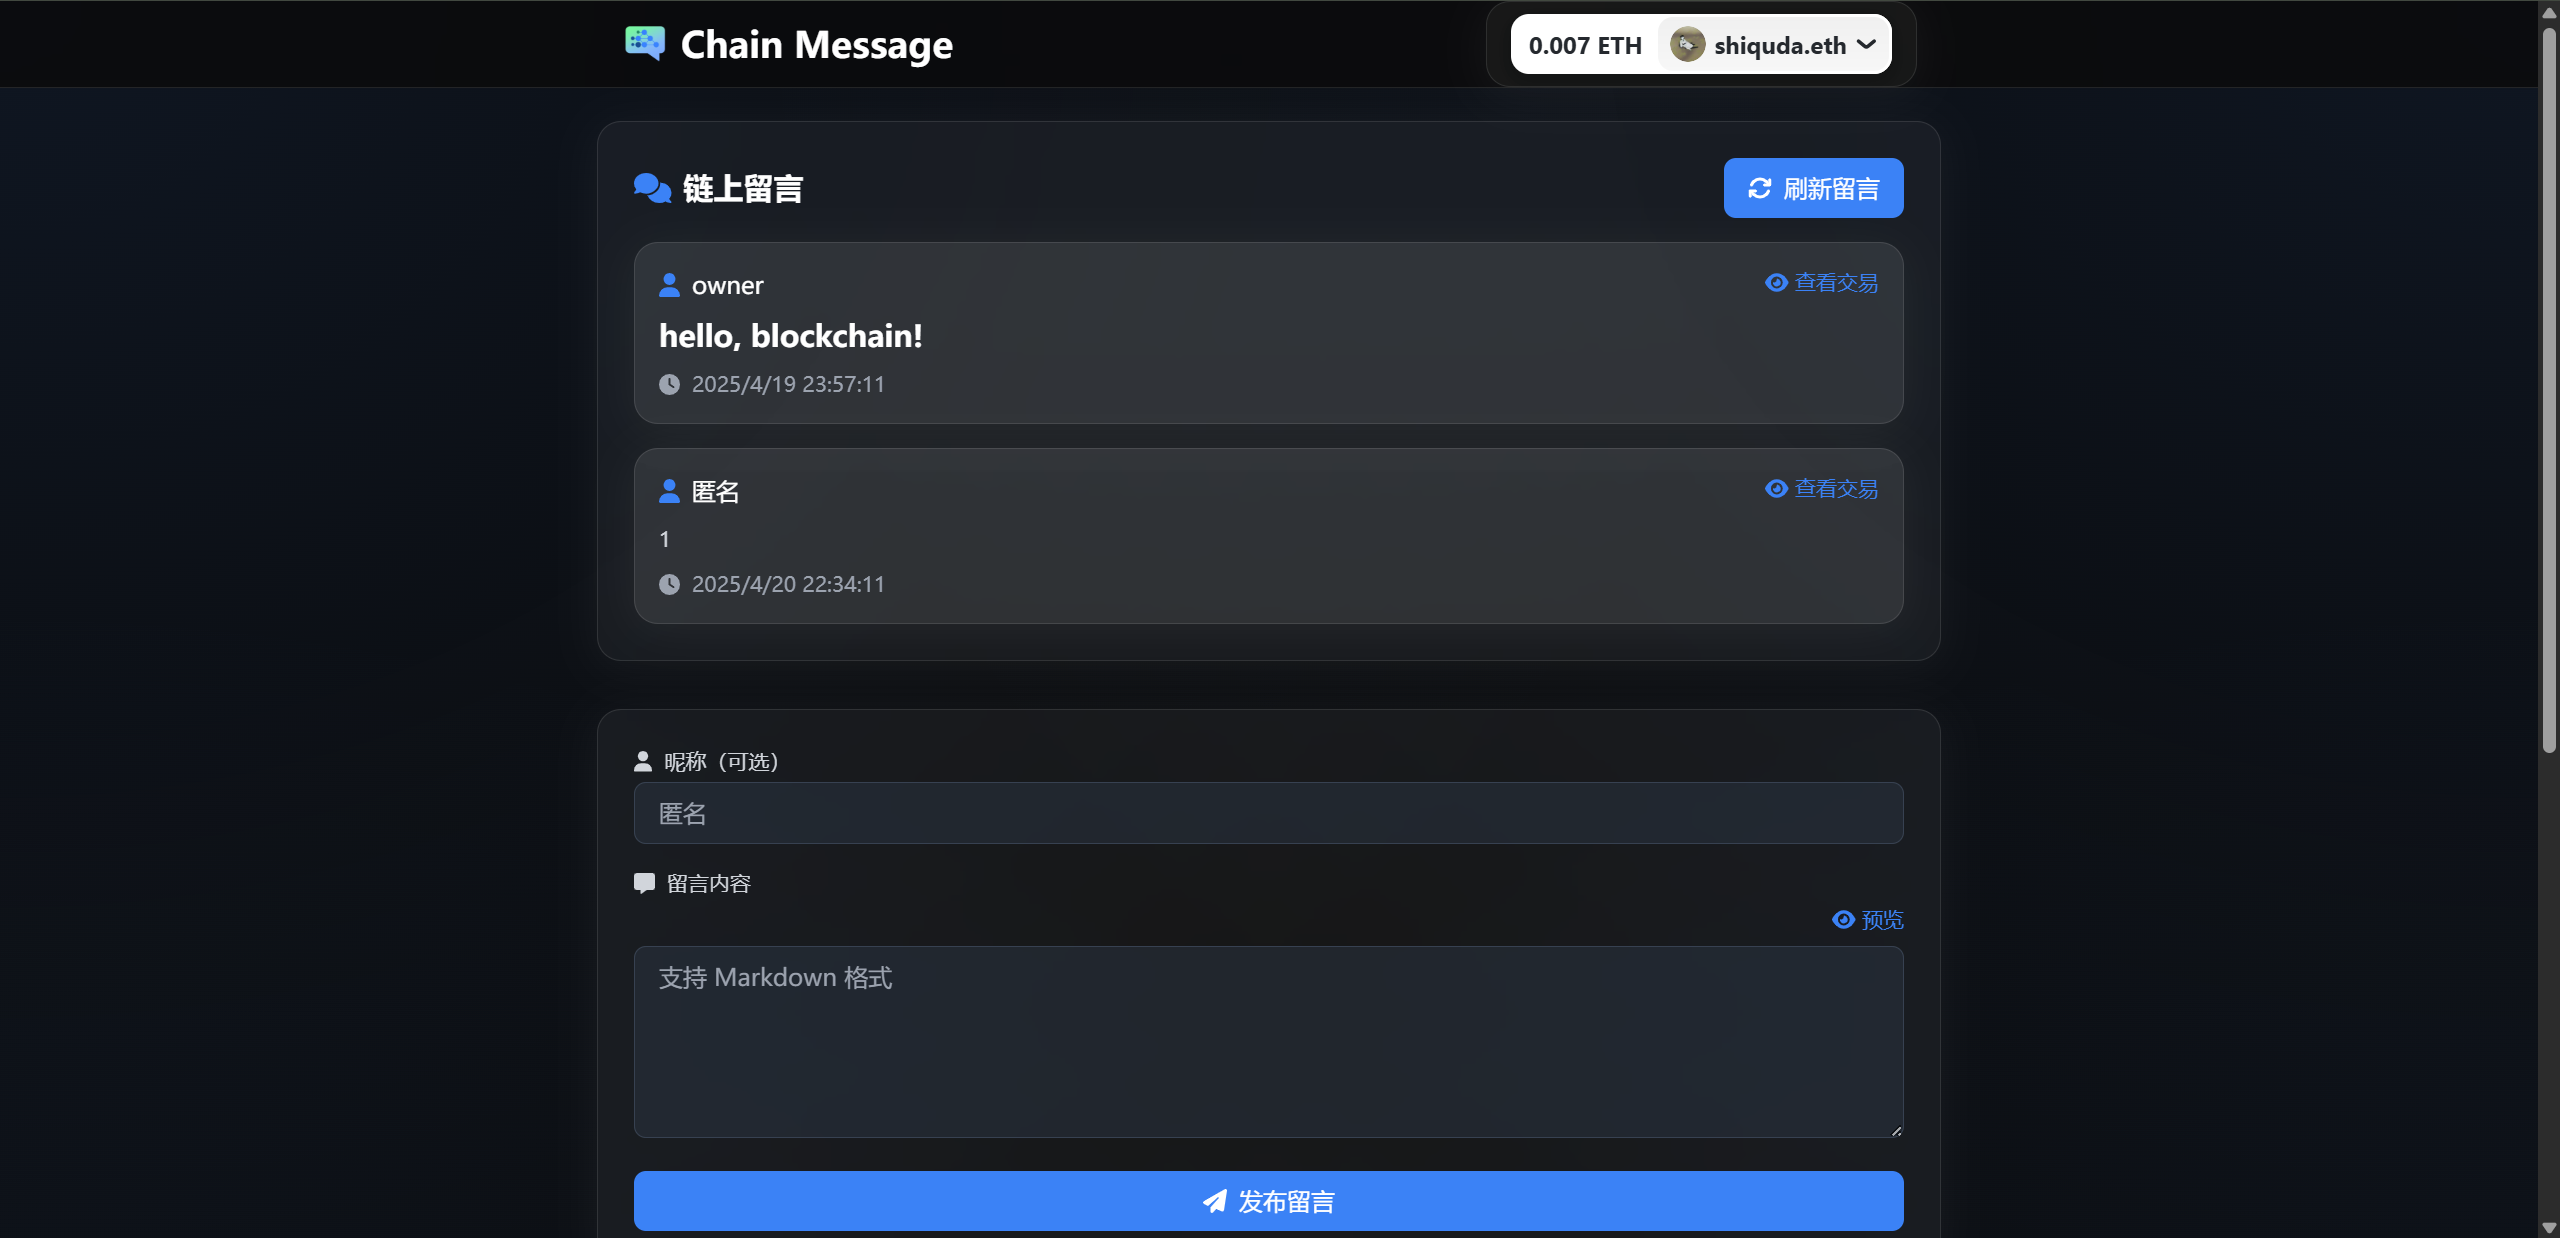
For the frontend, I used the React framework with Tailwind CSS for simple styling. The Web3 library I used is wagmi—thanks to the Web3 developers who came before us, they’ve already done a lot of the heavy lifting for us regular developers. This library automatically handles interaction with the user’s wallet plugin.
I won’t go into the implementation details here—interested readers can check out the source code.
Live demo: https://msg.shiquda.link/
Cloudflare Workers
The frontend itself is fairly simple, but a new problem emerged: how do users fetch the on-chain messages?
I first tried using public Ethereum nodes to fetch the logs. After trying several, I found that most don’t support unauthenticated calls. For fetching event logs, I did find a free one—https://ethereum.publicnode.com—but it only supports querying up to 50,000 blocks, which clearly didn’t meet my requirements. So I ended up using Etherscan’s API, which requires authentication.
But that raised another issue: if the API key is stored directly in the frontend, wouldn’t it be exposed and abused by others?
That’s when I thought of using Cloudflare Workers as a simple wrapper. When a user makes a request to the Cloudflare Worker, the worker reads the API key from an environment variable configured in CF, forwards the request to Etherscan as a proxy, and returns the response to the user. This way, the frontend can fetch messages in real time.
However, someone could still abuse the endpoint to query event logs. So I added another environment variable to restrict the endpoint to only query our deployed contract, which significantly reduces the incentive for abusers.
One gotcha here: Cloudflare Workers’ default domain is blocked by the GFW (Great Firewall). To work around this, you can use your own domain or subdomain as a forwarding route, which bypasses the restriction and lets users directly fetch the message data.
To configure Workers, find “Workers & Pages” on the left side of your Cloudflare dashboard, then Create > Workers > Hello world > Enter a name and deploy > Edit code, and paste the code below.
1 | // worker.js |
Then navigate to your Worker’s Settings > Variables and Secrets > Variables and Secrets > Add, and add the two environment variables: CONTRACT_ADDRESS and ETHERSCAN_API_KEY.
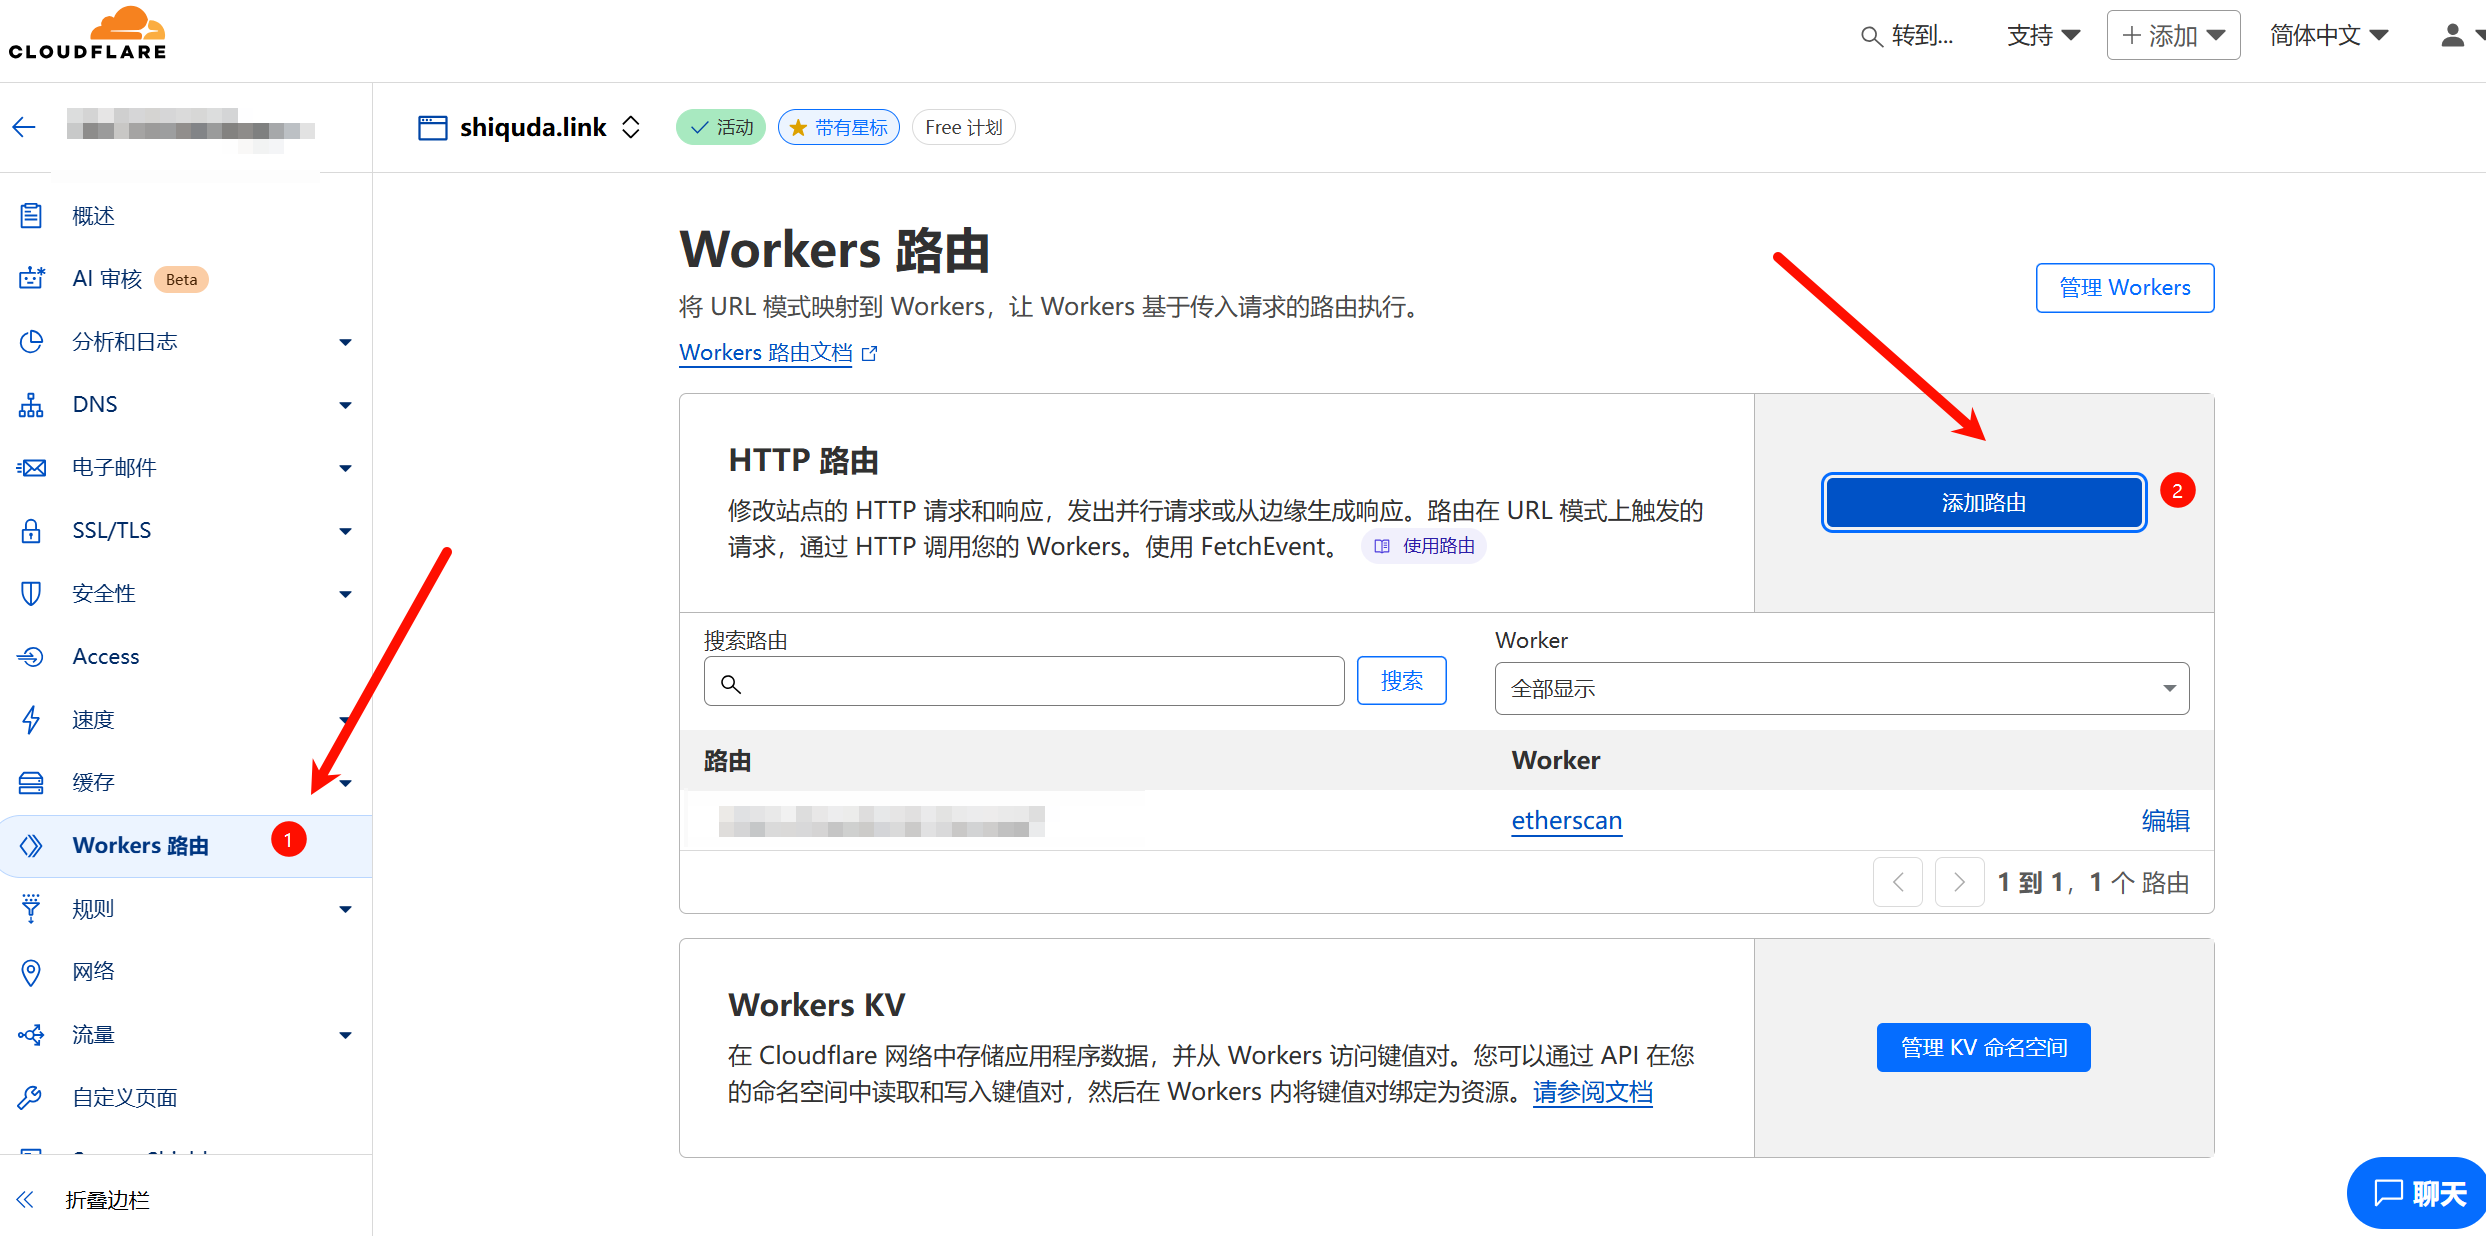
If you need to bind your own domain, go to the domain management page in CF, find “Workers Routes” on the left, add a route, and bind it to the Worker you created earlier.
Static Site Generation
Once everything is ready, we can generate a static page and upload it to our blog or a cloud hosting service, allowing it to run independently.
I recommend deploying with Cloudflare Pages. For a tutorial on this approach, see the deployment guide on GitHub.
Clone the project, install dependencies, and configure:
1 | git clone https://github.com/shiquda/chain-message.git |
Then refer to .env.example to fill in the required environment variables. Once that’s done, build with the following command:
1 | pnpm build |
The files in dist/ are the static site—you can host them on any hosting service.
Conclusion
After all this, I’m truly filled with emotion. A hundred years from now, after I’ve left this world, these messages might still exist on the blockchain. Others might even be able to access and read my messages, or the messages people left for me. That’s genuinely a cool thing.
Message board: https://msg.shiquda.link/
Regardless, let me leave a message for myself 10 years from now. (I typed one extra character, and it’s already irreversible 😄)

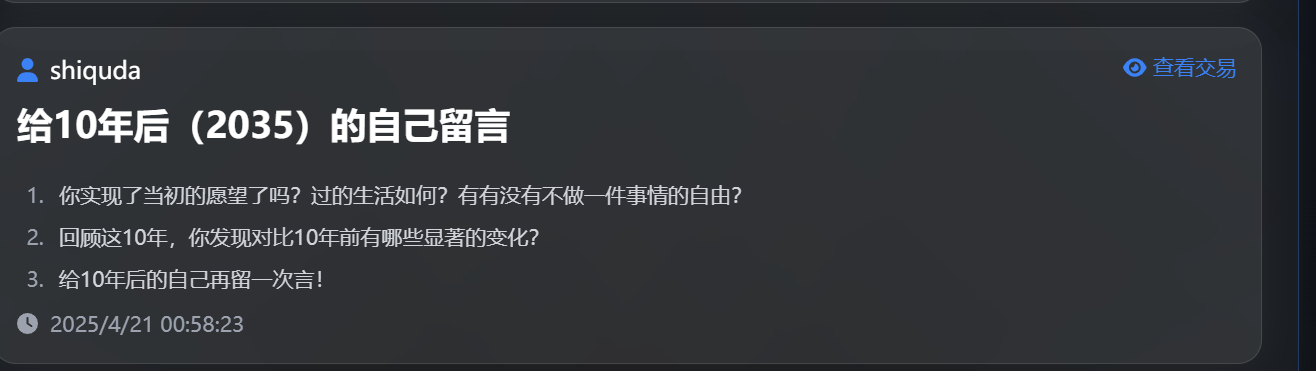
All the code for this idea—including the smart contract, frontend, and Cloudflare Workers code—is in the GitHub repo. If you’re interested, feel free to deploy your own and play around with it.
A few days ago, I registered an Ethereum address domain: shiquda.eth. Using this ENS domain, you can find my wallet address—the same address that deployed this contract. If this article inspired you, feel free to send some funds to that address 😄(I know, shameless plug)